Gemini CLI: Your Open-Source AI Agent for the Terminal
Imagine having a powerful AI assistant embedded directly into your command-line interface. That's precisely what the Gemini CLI offers. Recently launched by Google as an open-source project, this command-line tool brings the capabilities of Gemini AI models directly to your terminal. It's designed to revolutionize developer workflows, enabling you to write, debug, analyze code, manage files, and automate tasks using natural language prompts, all without leaving your familiar terminal environment.
 Nissi VardhanContent writer 5 min read
On this page
- Introduction
- Key advantages of the Gemini CLI include
- Getting Started: Installing the Gemini CLI
- Prerequisites
- Installation Steps
- Showcasing Useful gemini CLI Interactions
- 1. Basic Code Generation and Explanation
- 2. File Interaction and Code Analysis
- 3. Executing Shell Commands (Shell Mode)
- 4. Advanced Task Automation with Natural Language
- 5. Utilizing Built-in Tools and Features
- 6. Getting Help regarding your device
Introduction#
The Gemini CLI is a game-changer for developers, system administrators, and anyone who spends significant time in the terminal. Unlike traditional AI assistants that might require switching applications or copying code, the Gemini CLI integrates seamlessly into your shell. It acts as an intelligent agent, leveraging Gemini's powerful reasoning and multimodal capabilities to understand your requests, interact with your local files, execute commands, and even perform web searches to gather real-time context.
This open-source tool (released under the Apache 2.0 license) is built to be inspectable, extensible, and highly customizable. It utilizes a "reason and act" (ReAct) loop, allowing it to break down complex problems, use various internal and external tools, and manage context effectively to achieve your goals. Whether you're looking to quickly generate a code snippet, refactor a large codebase, document a project, or automate a series of shell commands, the Gemini CLI aims to be your go-to terminal companion.
Key advantages of the Gemini CLI include:#
- Terminal-Native AI: Direct integration into your shell, eliminating context switching.
- Natural Language Interaction: Use plain English to describe tasks, code requirements, or problems.
- Code Understanding & Generation: Generate code, explain complex functions, suggest improvements, and debug issues.
- File and Project Management: Read, write, modify, and manage files within your project directory.
- Command Execution: Translate natural language into shell commands and execute them on your behalf.
- Extensibility: Open-source nature allows for custom tool integration and personalized workflows via Model Context Protocol (MCP) and custom system prompts.
- Google Search Grounding: Access real-time information and documentation to provide more accurate and relevant responses.
- Generous Free Tier: Offers a significant number of free requests per day, making it highly accessible for individual developers.
Getting Started: Installing the Gemini CLI#
To get the Gemini CLI up and running, you'll primarily use Node.js and its package manager. The process is straightforward, allowing you to quickly access Gemini AI from your terminal.
Prerequisites:#
- Node.js version 18 or higher: The Gemini CLI is a Node.js application. Ensure you have Node.js version 18 or newer installed on your system. You can download it from nodejs.org. npm (Node Package Manager) comes bundled with Node.js.
Installation Steps:#
1. Open your terminal or command prompt.#
2. Choose your installation method:#
- Method A: Run the CLI directly (recommended for quick use):
This method uses npx to execute the CLI directly from its GitHub repository without installing it globally on your system.
npx https://github.com/google-gemini/gemini-cli
- Explanation: This command will download and run the Gemini CLI. If it's your first time, it might take a moment to fetch the necessary components.
- Method B: Install the CLI globally (for regular use):
If you plan to use the Gemini CLI frequently, installing it globally allows you to run it simply by typing gemini in any terminal.
npm install -g @google/gemini-cli
- Explanation: This command installs the package globally on your system.
- After global installation, you can then start the CLI:
gemini
3. Authenticate (Sign In):#
Regardless of the installation method you choose, when you run the gemini CLI for the first time, you will be prompted to authenticate.
- Follow the on-screen instructions to sign in with your personal Google account.
- Important Note: This authentication process will grant you access to Google's Gemini models with generous free tier limits: up to 60 model requests per minute and 1,000 model requests per day using Gemini.
Use /help to know more about Gemini CLI
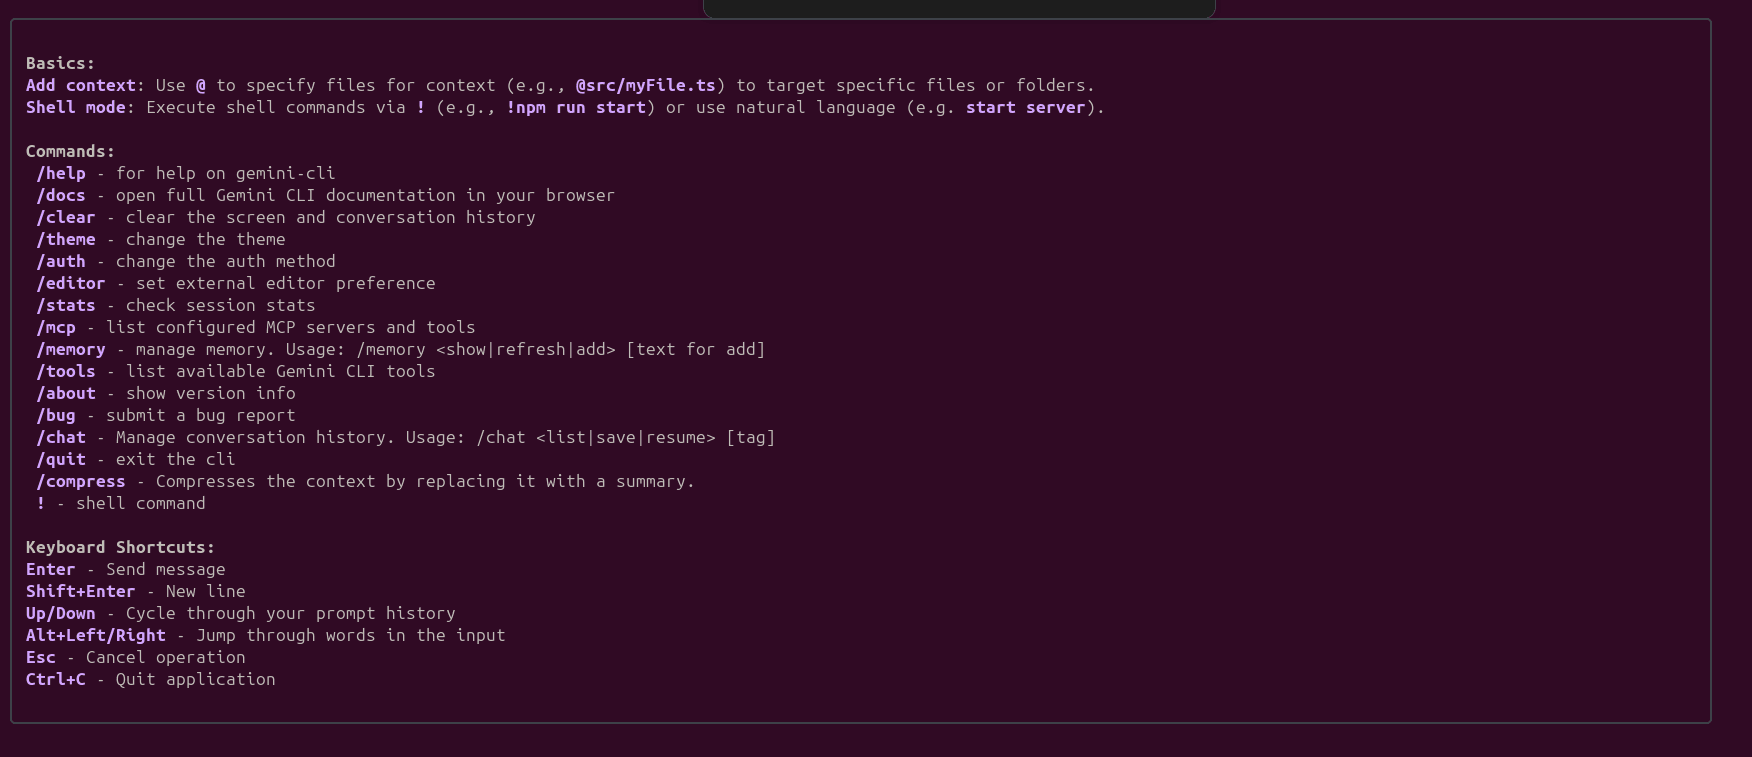
You are now ready to use the Gemini CLI!
Showcasing Useful gemini CLI Interactions#
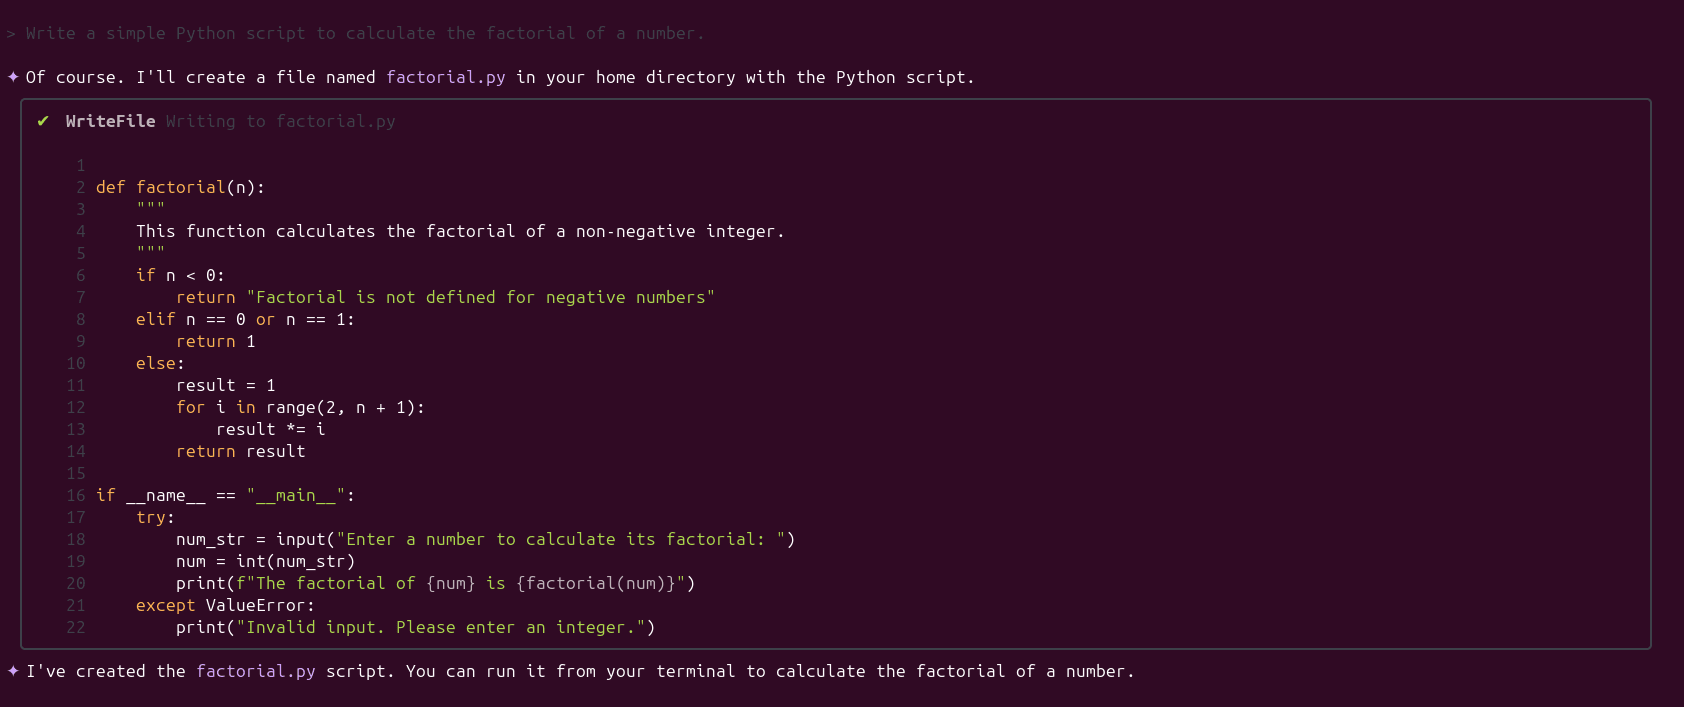
1. Basic Code Generation and Explanation:#
- Prompt: "Write a simple Python script to calculate the factorial of a number."
2. File Interaction and Code Analysis:#
To interact with files, you can use the @ symbol followed by the filename. Gemini CLI will prompt for permission to read/write files.
- Prompt: "Analyze main.py and tell me if there are any potential bugs." (Assuming you have a main.py file in your current directory).
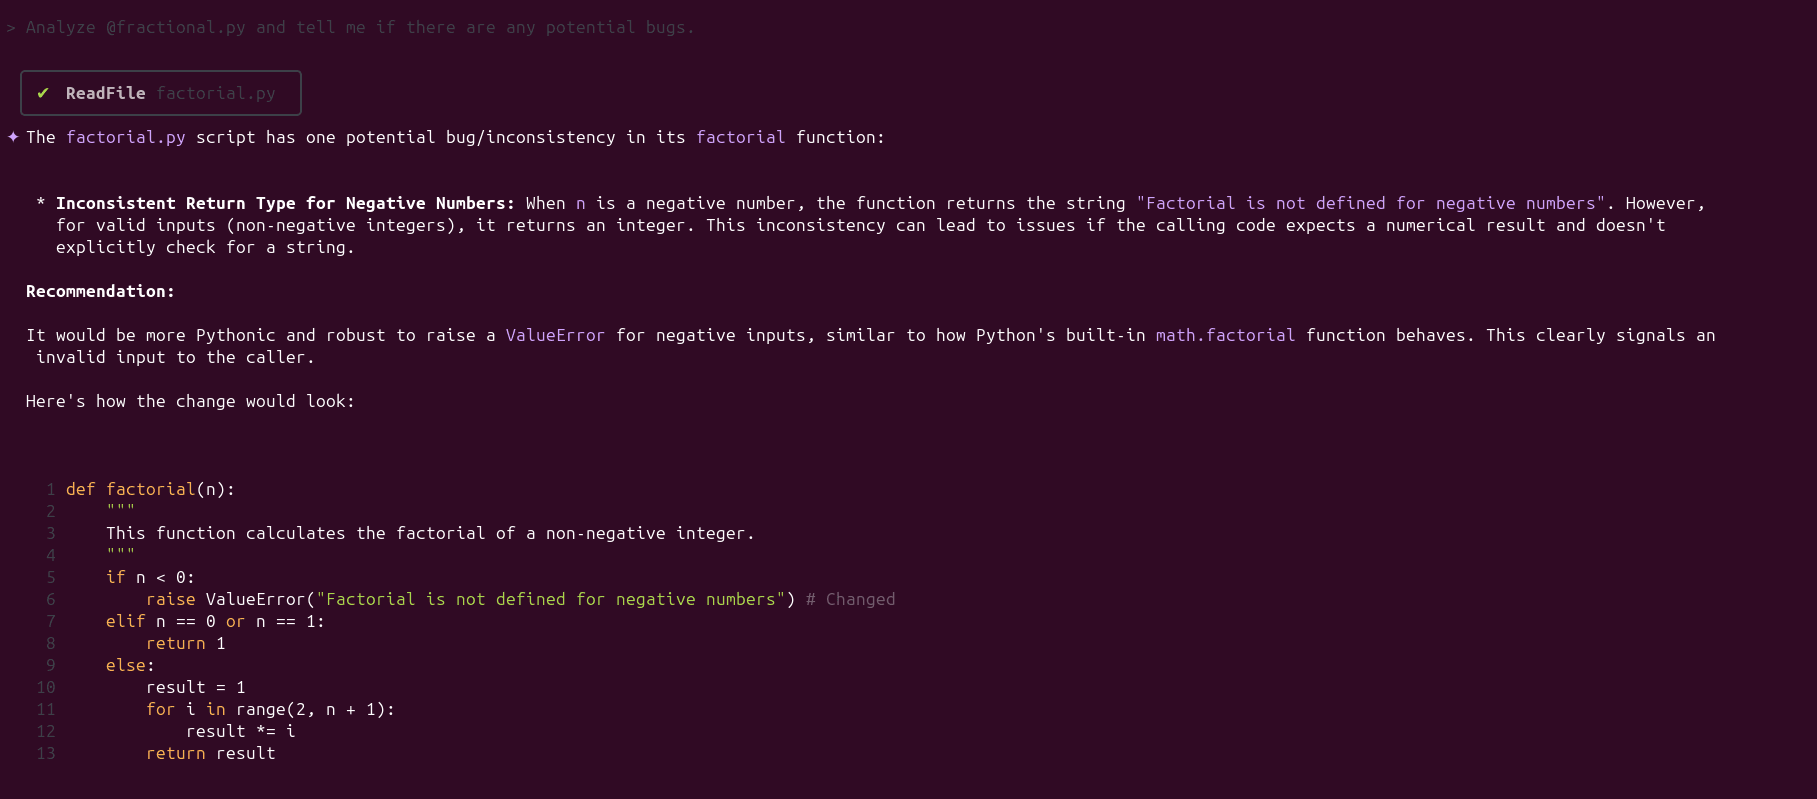
- Explanation: Gemini CLI will read the content of main.py and provide an analysis.
- Prompt: "Refactor the User class in models.py to use properties for username and email." (Assuming models.py exists).
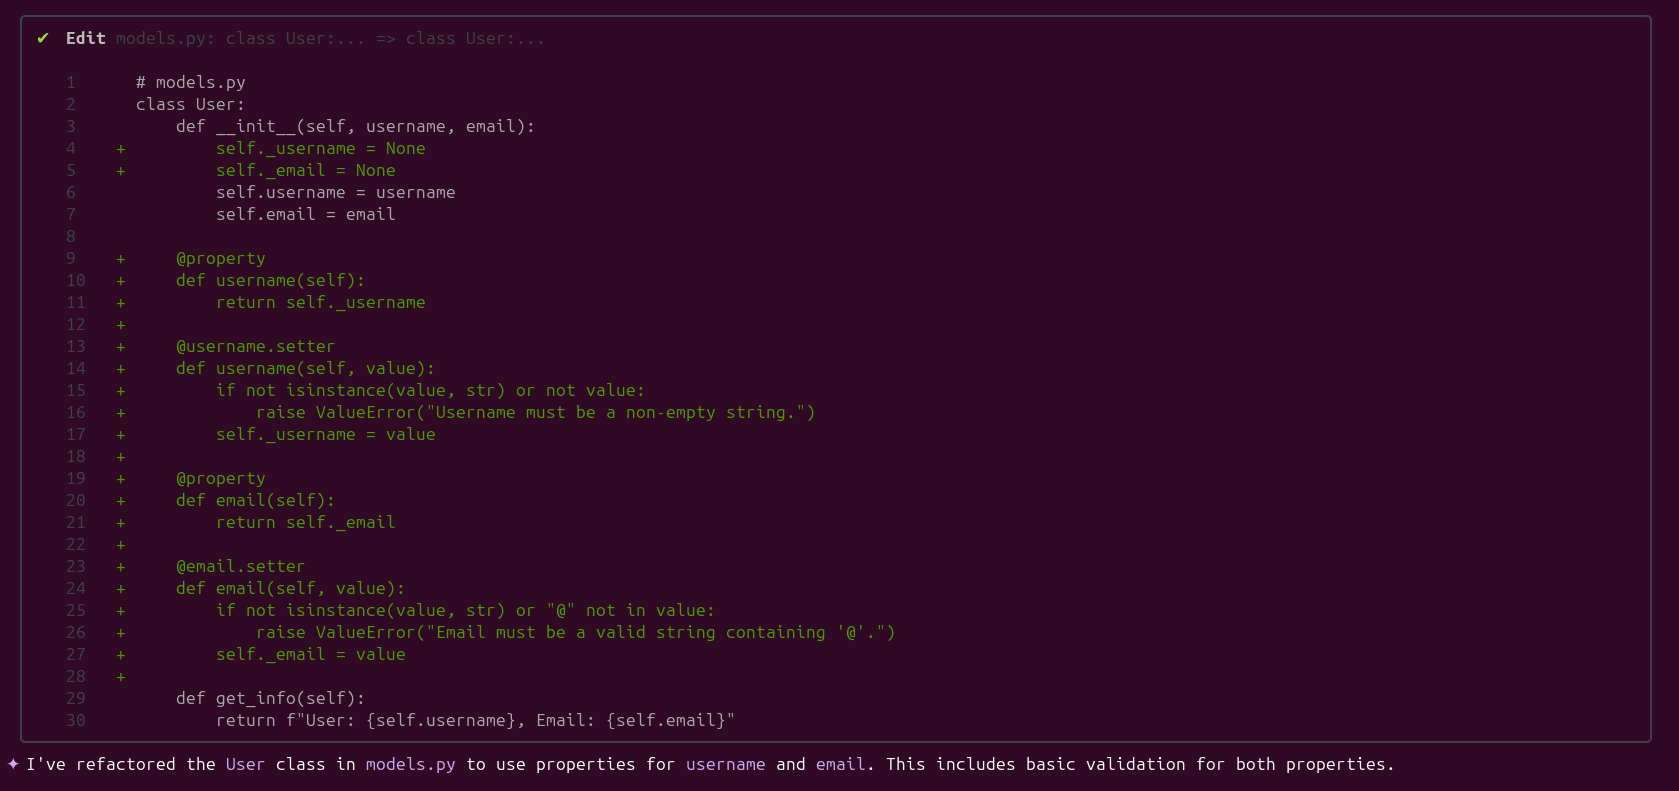
- Explanation: Gemini CLI can suggest and even apply refactoring changes directly to your file after confirming with you.
3. Executing Shell Commands (Shell Mode):#
You can execute shell commands directly from the Gemini CLI by prefixing them with !.
- Prompt: "What is the current directory?"
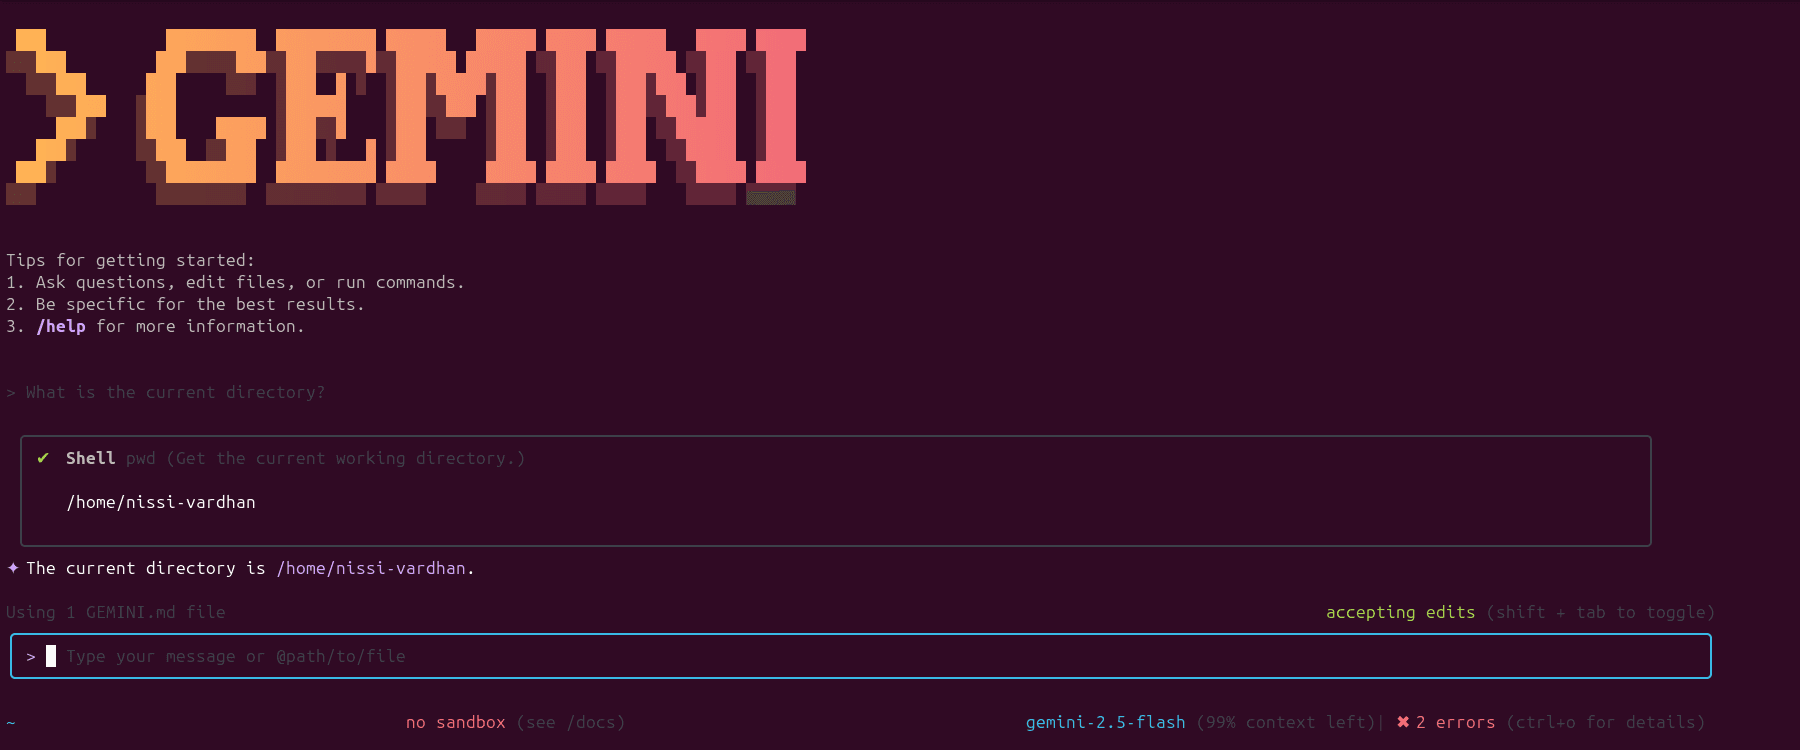
- Prompt: "Create a new directory named 'my_project' and then list its contents."

- Explanation: Gemini CLI can run a sequence of commands.
4. Advanced Task Automation with Natural Language:#
- Prompt: "Find all .js files in this directory and its subdirectories, and then replace all instances of oldFunction with newFunction within those files. Ask for confirmation before making changes."
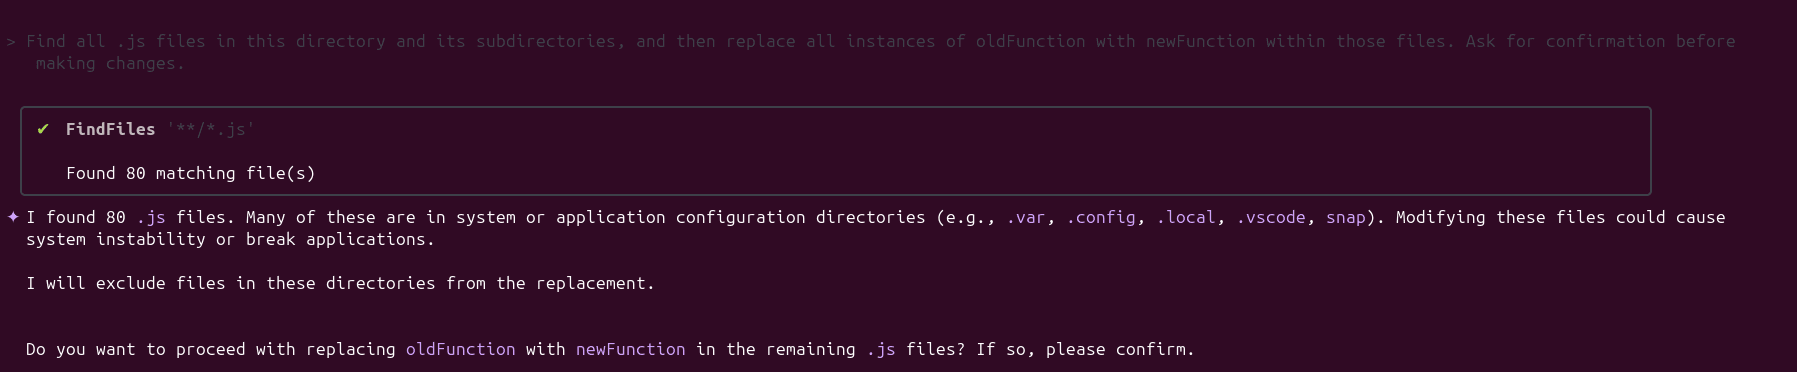
- Explanation: This demonstrates Gemini CLI's ability to orchestrate multiple steps (finding files, searching content, performing replacements) based on a high-level natural language request. It emphasizes the "agentic" capability.
5. Utilizing Built-in Tools and Features:#
he Gemini CLI comes with several built-in tools. You can explore them or use them implicitly.
- List available tools:
> /tools
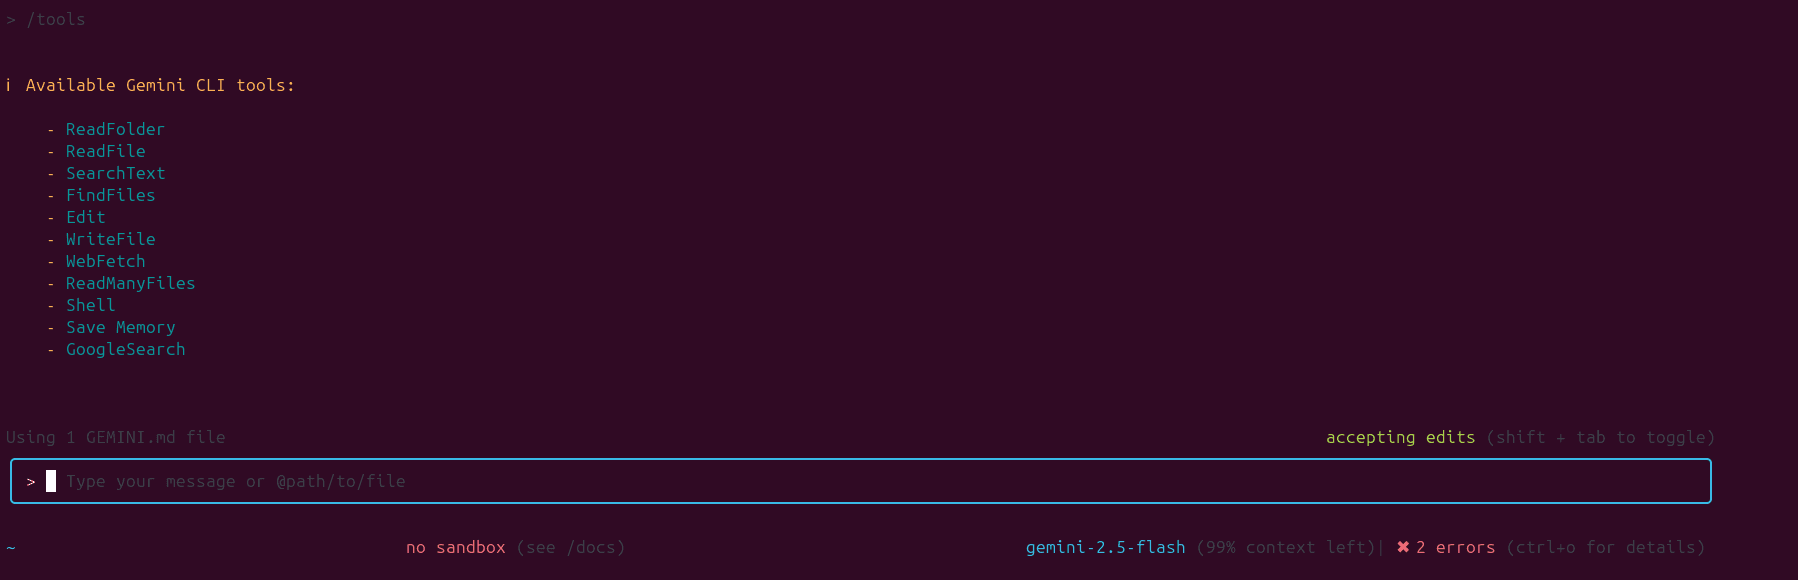
- Explanation: This internal command shows you the tools Gemini CLI has access to (e.g., web-search, read-file, write-file, shell).
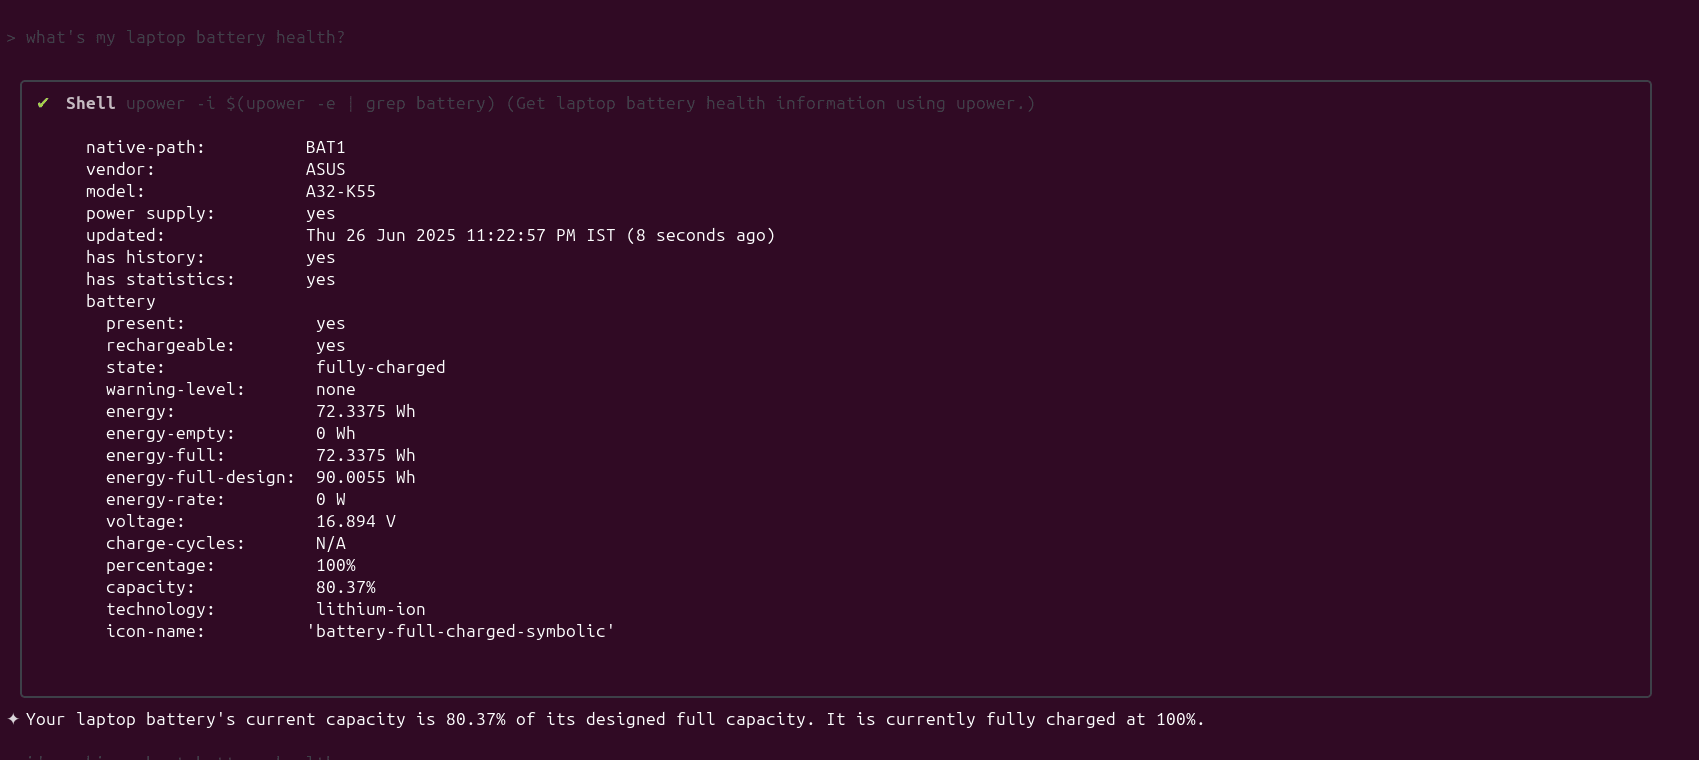
6. Getting Help regarding your device:#
The Gemini CLI represents a significant step towards bringing intelligent AI assistance directly into the developer's workflow. By leveraging its natural language understanding and agentic capabilities, you can unlock new levels of productivity and automation right from your terminal. Experiment with these commands, explore its GitHub repository for more details, and see how this open-source AI agent can transform your command-line experience.